
Mastering the Ztar MIDI Guitar: Your Ultimate Guide to the MIDI Guitar Controller
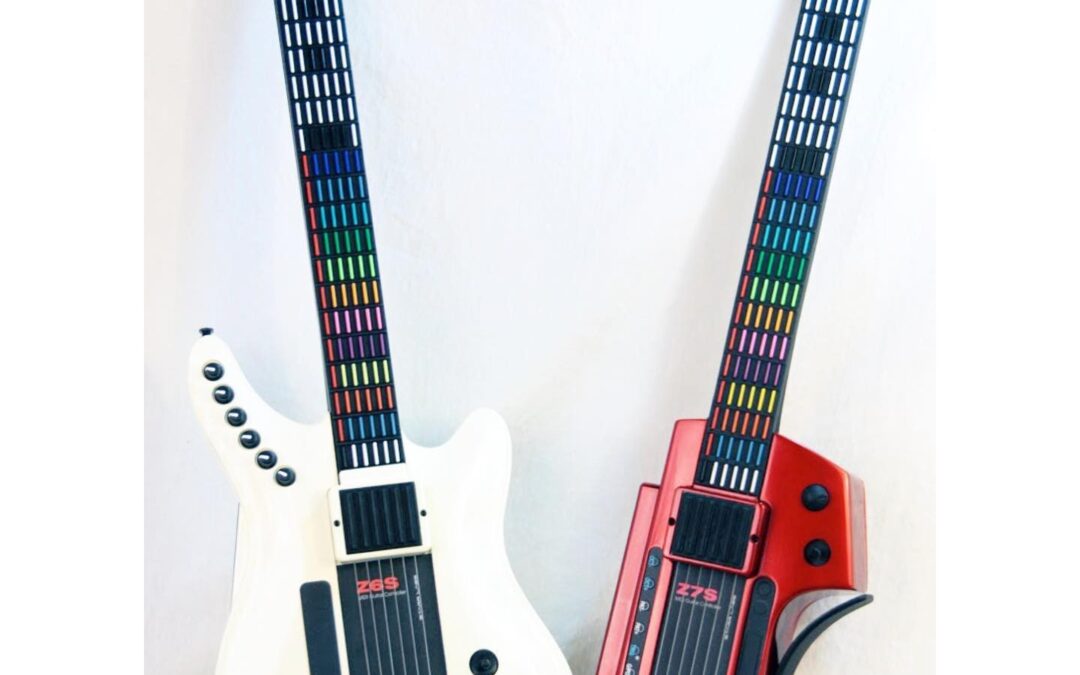
The Ztar by Starr Labs is a groundbreaking MIDI guitar controller that offers musicians an unprecedented level of control and versatility. Whether you’re a guitarist looking to expand your sound palette or a producer searching for a powerful MIDI controller, the Ztar is designed to bridge the gap between traditional stringed instruments and the digital music world. This guide will walk you through everything you need to know to get started, from powering up your Ztar MIDI Guitar to customizing your settings for an optimal playing experience.
Understanding the Ztar MIDI Guitar and Its Features
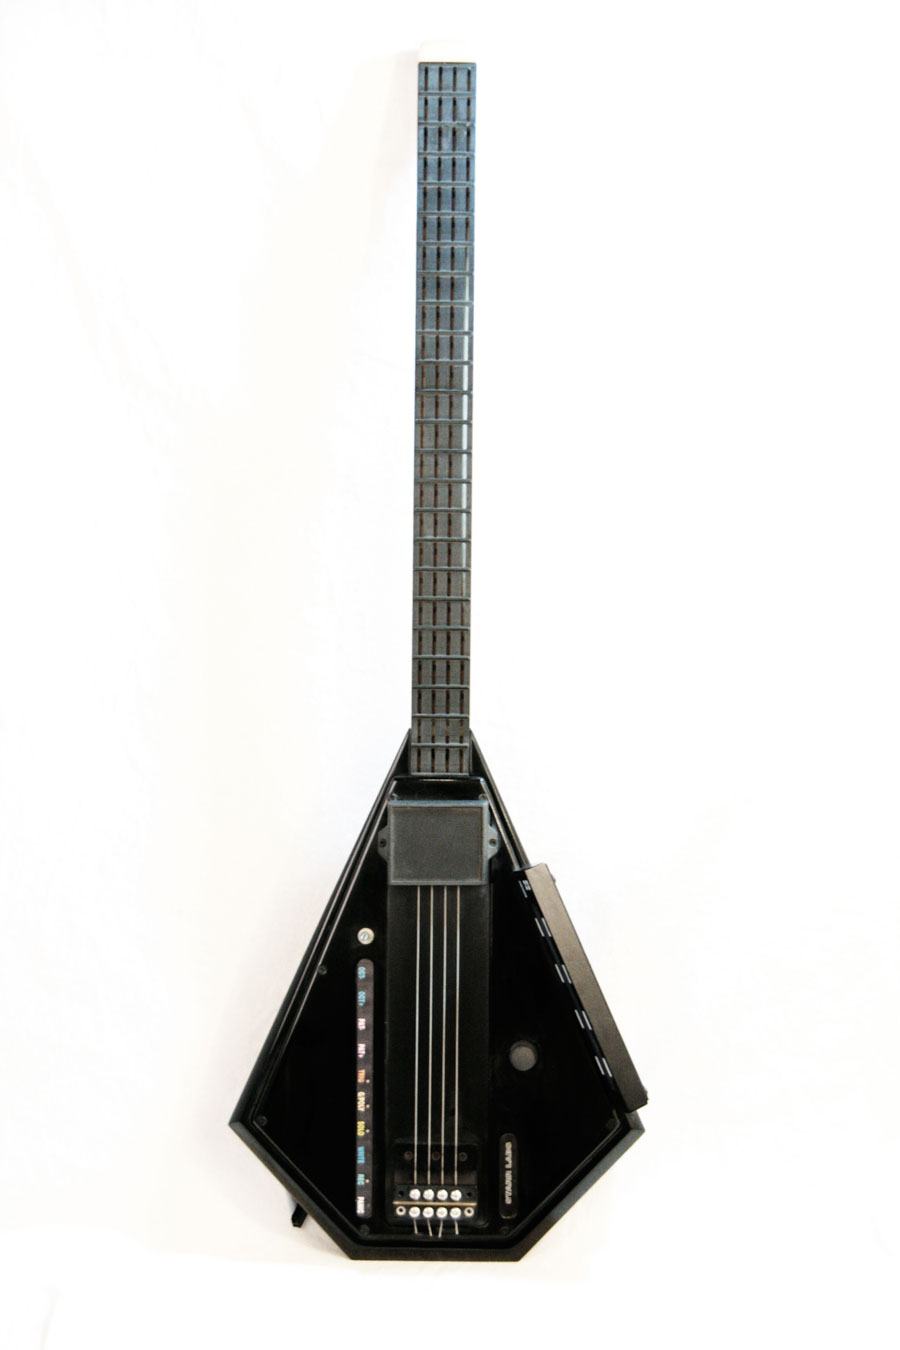
Unlike a traditional guitar, the Ztar MIDI Guitar is fully digital and does not rely on standard pickups or string vibrations to generate sound. Instead, it sends MIDI signals to control external hardware such as synthesizers, drum machines, and DAWs (Digital Audio Workstations). The Ztar’s fretboard and sensors can be programmed to trigger notes, chords, effects, and loops, making it an incredibly versatile instrument.
Key Features of the Ztar MIDI Guitar
- MIDI Output – Connects to synthesizers, virtual instruments, and other MIDI devices.
- String Triggers – Can be strummed like a guitar, or turned off for keyboard-style tapping.
- Programmable Fretboard – Every fret can be mapped to different notes, instruments, or effects.
- Customizable Sensors – Includes pads, buttons, and expression controls for additional flexibility.
- HotKeys & Display Menu – Provides quick access to key functions and in-depth programming options.
Unpacking and Setting Up Your Ztar
When you first receive your Ztar, ensure that all essential components are included:
- Ztar MIDI Guitar Controller – This is the main instrument.
- Power Supply – Includes an AC/DC adapter and a USB cable.
- PB-1 Phantom Power Adapter – Used for power and MIDI connectivity.
- User Manual & Software Resources – Available online for in-depth setup instructions.
Powering Your Ztar MIDI Guitar
Your Ztar supports multiple power options, making it highly flexible for both live performances and studio use.
Powering with AC/DC Adapter
- Connect a 5-conductor MIDI cable from the Ztar’s MIDI Output to the “Controller” port on the PB-1 adapter.
- Use another MIDI cable to connect the Synth jack on the PB-1 to the MIDI IN port of your synthesizer or MIDI device.
- Plug the AC/DC adapter into the PB-1 and switch the Ztar’s power switch to the “DC” position.
- The display screen should light up—if not, check your connections.
Powering via USB
- Connect a USB cable from the Ztar’s USB port to your computer.
- Move the power switch to the “USB” position.
- If your Ztar was built after July 2012, it should be plug-and-play, requiring no additional drivers.
Navigating the Ztar’s Interface
The Ztar is divided into two primary performance groups:
1. Fretboard
- Functions like a traditional guitar neck but with programmable keys instead of frets.
- Each key can be assigned to different MIDI notes, chords, effects, or sequences.
- Supports multi-zone mapping, allowing different fretboard areas to control separate instruments.
2. Sensors
- Includes string triggers, pads, pedals, and buttons.
- Can be used to trigger drum samples, change settings, or add expressive effects.
- Fully programmable via the menu system.
Function HotKeys
- Quick-access buttons for toggling performance modes, switching patches, and adjusting octaves.
- Essential for live performances where real-time adjustments are needed.
Display & Edit Menu
- Main control hub for adjusting all Ztar settings.
- Press “EDIT” to access the programming menu.
- Allows you to fine-tune sensor response, set tunings, and assign MIDI functions.
Basic Performance Setup
To start playing, follow these steps:
- Power on your Ztar – The startup display will show a list of 30 presets (Songs) They can all be over-written and Saved.
- Use Function HotKeys:
- TRIG Button – Switches between tapping and strumming.
- G/POLY Button – Toggles between monophonic and polyphonic modes.
- PATCH+/- – Changes program presets.
- OCT+/- – Shifts octave range.
Advanced Customization
The Ztar MIDI Guitar is fully programmable, allowing you to tailor its functionality to your needs.
Programming the Fretboard
- Access the Zone Menu to divide the fretboard into multiple areas.
- Assign each section to a different instrument, tuning, or effect.
- Save configurations as custom presets.
Configuring the Sensors
- Use the Sensor Menu to assign MIDI functions to pads, triggers, and pedals.
- Customize buttons to control DAW features, launch samples, or switch synth patches.
Adjusting String Triggers
- The Ztar MIDI Guitar’s string triggers can be customized for tension and sensitivity.
- Use the Response/Sensors menu to fine-tune trigger response.
Exploring Advanced Features
The Ztar offers a variety of additional functions to enhance your performance.
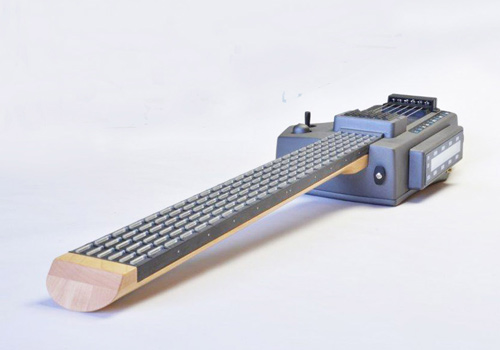
1. Trigger Cap Assembly (TCA-1)
- An optional set of expression pads located near the string triggers.
- Can be assigned to play drum beats, loops, chords, or MIDI effects.
- Accessible via the Sensors menu.
2. Wireless Connectivity
- Some models come with an RF MIDI Transmitter for cable-free operation.
- The transmitter and receiver must be set to matching channels.
- Can be used to control software synths and MIDI devices wirelessly.
3. Multi-Layered MIDI Control
- The Ztar supports multiple MIDI layers, meaning you can play multiple instruments at once.
- Assign different fretboard sections to separate MIDI channels for layered performances.
Troubleshooting Common Issues
If you experience any problems, check the following:
- No Power?
- Ensure the correct power source is selected (DC or USB).
- Verify all cable connections.
- No Sound Output?
- Check the MIDI output settings.
- Ensure your synthesizer or DAW is receiving MIDI input.
- String Triggers Not Responding?
- Adjust sensitivity settings in the Response/Sensors menu.
- Ensure the trimpots are correctly adjusted.
Final Thoughts – Take Your Music Further with the Ztar MIDI Guitar
The Ztar is not just an instrument—it’s a full-scale MIDI controller designed for maximum creativity. Whether you’re using it for live performances, studio recording, or digital production, the customization possibilities are endless. With its programmable fretboard, versatile sensors, and advanced MIDI capabilities, the Ztar allows you to create completely new sounds and playing styles.
If you ever need assistance, Starr Labs provides comprehensive support. Visit their website for software updates, additional guides, and expert assistance.
Ready to revolutionize your music? Power up your Ztar and start creating today by browsing our inventory online, giving us a call, or leave a message through the website!
Ztar MIDI Guitar Controller – Frequently Asked Questions (FAQ)
1. What is the Ztar?
The Ztar is a MIDI guitar controller developed by Starr Labs. It functions as a fully programmable digital instrument that allows musicians to trigger MIDI sounds, play virtual instruments, and control DAWs (Digital Audio Workstations) using a guitar-style interface.
2. How does the Ztar differ from a regular guitar?
Unlike a standard guitar that generates sound through vibrating strings, the Ztar is a specialized keyboard for guitarists that sends MIDI signals to external sound modules, synths, or computers. Instead of traditional strings, the fretboard features touch-sensitive keys, and the string triggers can be strummed or tapped for a responsive playing experience.
3. Does the Ztar produce sound on its own?
No, the Ztar does not have built-in sounds. It must be connected to a synthesizer, computer, or iOS device to generate sound.
4. What types of instruments can I control with the Ztar?
The Ztar can be used to control any MIDI-compatible instrument or software, including:
- Synthesizers
- Drum machines
- Virtual instruments in DAWs (Logic, Ableton, FL Studio, etc.)
- Orchestral libraries
- Samplers and sound modules
- Lighting systems
- Museum installations
5. How is the Ztar powered?
The Ztar can be powered in multiple ways:
- AC/DC Adapter – Using the included PB-1 Phantom Power Adapter.
- USB Connection – Drawing power directly from a computer.
- Battery Pack – Available for wireless operation.
6. Can I use the Ztar with a computer?
Yes, the Ztar is fully compatible with computers via USB MIDI. It is plug-and-play for most modern operating systems and does not require additional drivers. Bluetooth is also available
7. Do I need a MIDI interface to use the Ztar?
No. However, if you are using the traditional MIDI ports, you may need an external MIDI interface depending on your setup. The Ztar is provided with a MIDI adapter that powers the instrument and communicates over the 5-pin MIDI interface. No other adapter is needed.
8. How do I change tunings on the Ztar?
There is a variety of standard Tunings provided in the Tuning menu as Presets. The Ztar allows for custom tunings through the Fretboard/Tuning Menu. You can:
- Program alternate tunings like Drop D, Open G, or custom scales.
- Set each fretboard section to a different tuning or MIDI channel.
9. Can I play the Ztar like a traditional guitar?
Yes, the string triggers allow you to strum and pick notes similarly to a guitar. And, if you desire, you can add additional FX with your strumming performance. However, you can also disable the triggers and use it like a keyboard, tapping notes directly on the fretboard.
10. What are the Function HotKeys?
The HotKeys are quick-access buttons located on the Ztar. They allow you to:
- Toggle between tapping and strumming modes.
- Switch between monophonic and polyphonic playstyles.
- Change patches, octaves, and MIDI settings on the fly.
- Record chords and sequences
- Quickly create setups to Select and Combine multiple sounds on the Fretboard.
11. How do I connect the Ztar to a DAW?
To use the Ztar with a DAW (such as Ableton, Logic, or FL Studio):
- Connect via USB (or use a MIDI interface).
- Select the Ztar as a MIDI input device in your DAW’s settings.
- Load a virtual instrument or synth and assign the Ztar to control it.
- Use the Edit Menu to customize MIDI mappings and controls.
12. Can I assign different instruments to different fretboard zones?
Yes, the Ztar supports multi-zone mapping, allowing you to:
- Assign different MIDI channels to specific fretboard sections.
- Play a bassline with the lower frets and a lead synth with the upper frets.
- Use split tuning for unique performance setups.
13. How do I program the pads and sensors?
The Sensor Menu allows you to customize the pads, pedals, and expression controls. These can be programmed to:
- Trigger MIDI notes, chords, or loops.
- Adjust effects parameters such as reverb, delay, or filter sweeps.
- Control DAW functions like play, stop, and record.
14. What is the Trigger Cap Assembly (TCA-1)?
The TCA-1 is an optional set of expression pads that can be installed on the Ztar. These pads:
- Allow finger drumming or triggering effects.
- Can be programmed to play sequences, change patches, or send MIDI control messages.
15. Can I use the Ztar wirelessly?
Some models of the Ztar include RF MIDI transmitters, allowing for wireless performance. The transmitter sends MIDI data to a wireless receiver, which can be connected to a synthesizer or computer.
16. How do I adjust the sensitivity of the fretboard and string triggers?
The Ztar allows you to customize response curves using the Response/Sensors menu. You can:
- Adjust the sensitivity of the string triggers to match your playing style.
- Fine-tune the velocity response of the fretboard keys.
- Create custom curves for different playing techniques.
17. What do I do if my Ztar is not responding correctly?
If you experience issues:
- Check the power source (AC/DC, USB, or battery).
- Ensure all MIDI cables are properly connected.
- Verify the MIDI settings in your DAW or synth.
- Adjust the string trigger sensitivity if notes are not triggering properly.
- Restart the Ztar and check the Edit Menu for misconfigured settings.
18. Can I store custom settings and patches?
Yes, the Ztar has battery-backed memory, which allows you to:
- Save custom presets, tunings, and MIDI configurations.
- Create different performance modes for live shows.
- Quickly recall saved settings using the Edit Menu.
19. Is the Ztar compatible with hardware synths and drum machines?
Yes, the Ztar can control any MIDI-compatible hardware, including:
- Roland, Korg, and Yamaha synthesizers.
- Elektron drum machines and sequencers.
- Modular synth setups using a MIDI-to-CV converter.
20. Where can I get additional support and updates?
For technical support, software updates, and additional resources, you can:
- Visit the Starr Labs website for manuals and firmware downloads.
- Contact Starr Labs customer support via phone or email.
- Join online forums or social media groups where Ztar users share tips and solutions.
The Ztar is a powerful and versatile instrument that can take your music production and live performances to the next level. With its fully customizable features and intuitive interface, it provides endless possibilities for creative expression. If you need further assistance, don’t hesitate to reach out for support or explore the online community for new ideas and insights!