
Ztar MIDI Guitar Controller – The Ultimate Getting Started Guide
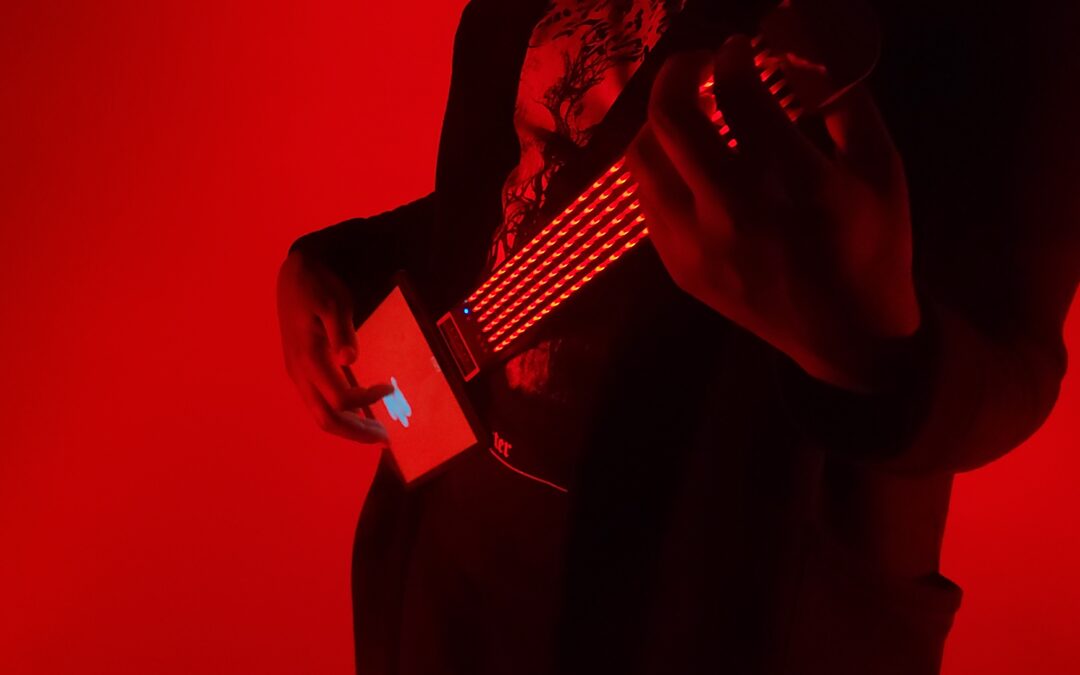
The Ztar MIDI Guitar Controller by Starr Labs is a game-changing instrument for musicians looking to bridge the gap between traditional guitar playing and modern MIDI control. Whether you’re a guitarist, producer, or live performer, the Ztar offers unparalleled flexibility to shape and control music in ways a standard guitar cannot.
This guide will take you through everything you need to know to get started with your Ztar, including setup, features, customization, and performance tips.
What is the Ztar MIDI Guitar Controller?
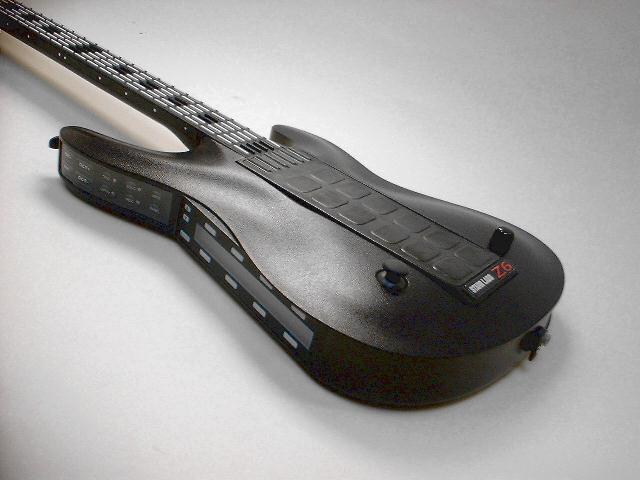
Unlike a conventional guitar, the Ztar is a digital MIDI controller that does not produce sound on its own. Instead, it sends MIDI signals to synthesizers, DAWs (Digital Audio Workstations), and other MIDI-compatible devices. The fretboard and string triggers are designed to provide guitarists with an expressive way to interact with digital music technology.
Key Features of the Ztar
- Programmable Fretboard – Each fret can be assigned to different notes, instruments, or MIDI effects.
- String Triggers and Trigger Pads – Play like a real guitar or use tap-triggered MIDI control.
- Multi-Zone Performance – Assign different areas of the fretboard to separate instruments or sounds.
- MIDI Connectivity – Connect to synthesizers, drum machines, DAWs, and more.
- Customizable Sensors – Pads, buttons, and expression controls for added control.
- Wireless Capabilities – Some models support RF MIDI transmission for cable-free operation.
Ztar Setup and Powering Options
Your Ztar can be powered in multiple ways, making it highly adaptable for studio or live performance use.
Powering with AC/DC Adapter
- Connect a 5-conductor MIDI cable from the Ztar MIDI Output to the PB-1 power adapter.
- Use another MIDI cable to connect the PB-1’s “Synth” port to the MIDI IN of your synthesizer or MIDI device.
- Plug the AC/DC adapter into the PB-1.
- Set the power switch to “DC”, and your Ztar should power on.
Powering via USB
- Connect a USB cable from the Ztar’s USB port to your computer.
- Set the power switch to “USB”.
- If your Ztar was built after July 2012, no drivers are needed—it’s plug-and-play.
Wireless Power Options
Some Ztar models allow for wireless MIDI connectivity, which can be powered using:
- Embedded rechargeable Li-ion battery system
- 9VDC Wall Adapter
- USB Power Bank
This feature is ideal for live performances, where movement is essential.
Ztar Interface and Navigation
The Ztar’s interface is designed for real-time control and customization.
1. Fretboard & Sensors
- The fretboard is touch-sensitive and can be mapped to any MIDI note, scale, or sound.
- The String Triggers allow for strumming and picking like a real guitar.
- Additional pads and pedals can be assigned to trigger MIDI effects, chords, or loops.
2. Function HotKeys
- TRIG Button – Switches between tapping and strumming modes.
- G/POLY Button – Toggles between monophonic and polyphonic playstyles.
- PATCH+/- – Changes synth patches.
- OCT+/- – Shifts the octave range.
3. Display & Edit Menu
- Press “EDIT” to access the programming menu.
- Adjust the fretboard sensitivity, assign MIDI controls, and set tunings.
Basic Performance Modes
1. Guitar Mode (Preset 1)
- Plays like a traditional guitar.
- String triggers are ON.
- The fretboard follows standard guitar tuning.
2. Chord Mode (Preset 2)
- Each fretboard key plays full chords.
- Strumming the string triggers activates the chords.
3. Multi-Zone Performance
- Assign different sections of the fretboard to unique MIDI channels.
- Example: Bass on lower frets, lead synth on upper frets.
Advanced Customization
1. Customizing the Fretboard
- Use the Zone Menu to divide the fretboard into multiple performance areas.
- Assign each section to a different instrument or tuning.
2. Programming MIDI Controls
- Use the Sensor Menu to map buttons, pedals, and pads to different functions.
- Assign these controls to effects, drum loops, and DAW commands.
3. Multi-Harp Mode
- Assign full chords to single fretboard keys.
- Allows for complex harmonic layering with minimal effort.
Performance and Playing Techniques
1. Strumming vs. Tapping
- Strumming – More natural with String Triggers.
- Tapping – Works well with both String Triggers and Trigger Pads.
2. Using the Trigger Cap Assembly (TCA-1)
- The TCA-1 pads can trigger drum beats, effects, and MIDI sequences.
- Great for hybrid playing techniques combining guitar and drum-like control.
3. Hammer-Ons & Pull-Offs
- The fingerboard supports hammer-ons for fluid playing.
- Fully customizable via the Edit Menu.
Connectivity & Integration with DAWs
1. Connecting to a DAW
- Connect via USB or a MIDI interface.
- Open your DAW (Ableton, Logic, FL Studio, etc.).
- Select the Ztar as a MIDI input device.
- Load a virtual instrument or synth, and assign Ztar controls accordingly.
2. Using External Synths
- The MIDI OUT allows connection to hardware synthesizers and drum machines.
- Use a MIDI-to-CV converter for modular synth control.
Troubleshooting Common Issues
No Power?
- Ensure the correct power source is selected.
- Check cable connections.
No Sound Output?
- Verify the MIDI output settings.
- Ensure your synth or DAW is receiving MIDI input.
String Triggers Not Responding?
- Adjust settings in the Response/Sensors menu.
- Increase or decrease trigger sensitivity.
Final Thoughts – Is the Ztar Right for You?
The Ztar MIDI Guitar Controller is the ultimate instrument for guitarists, producers, and live performers looking to expand their creative possibilities. Whether you want to trigger synths, play full chords with a tap, or customize an entire fretboard for unique MIDI control, the Ztar delivers an unmatched level of versatility.
Need help setting up your Ztar? Contact Starr Labs support or check out their official resources for more tutorials!
Ready to take your music to the next level? Power up your Ztar and start creating today!
Ztar MIDI Guitar Controller – FAQ
General Questions
-
What is the Ztar MIDI Guitar Controller?
The Ztar is a digital MIDI controller designed for guitarists, producers, and performers. Unlike a standard guitar, it does not produce sound on its own but sends MIDI signals to synthesizers, DAWs, and other MIDI-compatible devices. -
How is the Ztar different from a traditional guitar?
While it has a guitar-like fretboard and string triggers, the Ztar functions as a MIDI controller, allowing you to trigger sounds from virtual instruments, synthesizers, and drum machines instead of producing sound acoustically or electrically. -
Who is the Ztar best suited for?
The Ztar is ideal for musicians who want more control over digital music production, guitarists looking to integrate MIDI technology, and performers seeking a versatile live instrument. -
Does the Ztar require an amplifier?
No, the Ztar does not generate sound on its own. You need to connect it to a MIDI-compatible device like a synthesizer, DAW, or virtual instrument.
Setup & Power Options
-
How do I power my Ztar?
The Ztar can be powered using an AC/DC adapter, USB connection, or in some models, a rechargeable battery. -
Can I use the Ztar wirelessly?
Yes, certain Ztar models support wireless MIDI connectivity via RF transmission and can be powered with a rechargeable Li-ion battery. -
Do I need to install drivers for the Ztar?
If your Ztar was built after July 2012, it is plug-and-play and does not require drivers for USB operation.
MIDI & DAW Connectivity
-
How do I connect the Ztar to a DAW?
Connect via USB or MIDI, open your DAW (Ableton, Logic, FL Studio, etc.), and select the Ztar as a MIDI input device. Then, assign it to a virtual instrument. -
Can I use the Ztar with hardware synthesizers?
Yes, you can connect the Ztar to external synthesizers and drum machines using its MIDI OUT port. -
Can I map different sections of the fretboard to different sounds?
Yes, the Ztar supports multi-zone performance, allowing different sections of the fretboard to control different instruments or sounds.
Playing & Customization
-
Does the Ztar support traditional guitar playing techniques?
Yes, it allows for strumming, tapping, hammer-ons, and pull-offs, though these techniques are MIDI-triggered rather than purely acoustic. -
How do I switch between strumming and tapping?
Press the TRIG button to switch between strumming and tapping modes. -
Can I assign full chords to a single fretboard key?
Yes, the Multi-Harp Mode lets you program chords to specific fretboard keys, allowing for one-touch chord performance. -
How do I change the tuning of the Ztar?
Press EDIT to access the tuning menu and customize the fretboard layout to any tuning or scale.
Performance & Live Use
-
Can I use the Ztar in a live performance?
Absolutely! With features like wireless MIDI, multi-zone performance, and trigger pads, the Ztar is perfect for live shows. -
Does the Ztar have built-in expression controls?
Yes, it includes buttons, pads, and pedal inputs that can be assigned to effects, loops, and DAW controls.
Troubleshooting
-
Why is my Ztar not powering on?
Check the power source (USB, AC/DC adapter, or battery) and ensure all cables are securely connected. -
Why is there no sound when I play?
Verify your MIDI output settings, ensure your DAW or synth is receiving MIDI input, and check the instrument patch settings. -
Why aren’t my string triggers responding?
Go to the Response/Sensors Menu and adjust the trigger sensitivity settings. -
Where can I get support for my Ztar?
You can contact Starr Labs Support through their official website or check their resources for tutorials and troubleshooting guides.